Free Quote
Free Quote

Free Quote
Free Quote
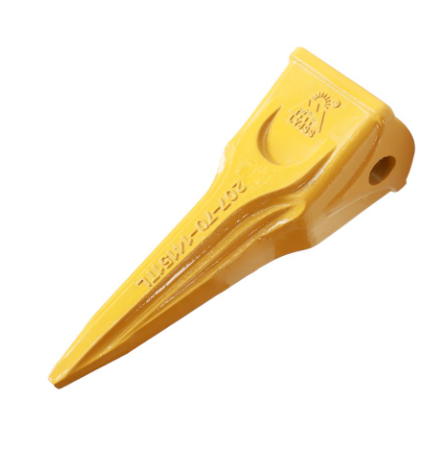
Choosing and replacing bucket teeth yourself can be a straightforward task if you follow the right steps. Bucket teeth are critical for maintaining the efficiency and durability of construction, mining, and agricultural equipment. Here’s a step-by-step guide:
Step 1: Identify the Right Bucket Teeth
Before purchasing replacement bucket teeth, consider the following:
Compatibility with the Equipment: Check the model and specifications of your machinery to ensure the teeth fit.
Application Needs: Choose the teeth based on the type of material you’ll be handling (e.g., soil, rock, gravel).
General Purpose Teeth: For softer soil or light-duty work.
Rock Teeth: For hard, rocky surfaces.
Tiger Teeth: For precision digging or breaking tough ground.
Material: Opt for high-quality, wear-resistant steel or alloy teeth to ensure durability.
Mounting Style: Determine if your current teeth are bolted, pinned, or welded to select compatible replacements.
Adpaters for Komatsu large excavators
Step 2: Gather the Necessary Tools
Before beginning the replacement process, prepare the required tools:
A hammer or mallet.
A punch tool for removing pins.
A wrench or spanner for bolt-on teeth.
Safety equipment such as gloves and goggles.
Replacement pins, bolts, or adapters (if needed).
Step 3: Remove the Old Bucket Teeth
Follow these steps to safely remove the worn-out teeth:
Inspect the Existing Teeth: Ensure the equipment is turned off and stable. Identify worn or damaged teeth.
Release the Fasteners:
For pinned teeth, use the hammer and punch tool to drive out the securing pins.
For bolted teeth, use the wrench to loosen and remove bolts.
For welded teeth, cut through the welds using a cutting tool or grinder.
Remove the Teeth: Gently slide or pry the old teeth off the adapter or bucket lip.

Bucket teeth for Komatsu mid-size excavators
Step 4: Install the New Bucket Teeth
Now that the old teeth are removed, you can fit the replacements:
Clean the Adapter or Bucket Lip: Remove dirt, rust, or debris to ensure a secure fit for the new teeth.
Position the New Teeth: Slide or place the new teeth onto the adapters or bucket edge, aligning them properly.
Secure the Teeth:
For pinned teeth, insert the pin through the holes and use a hammer to lock it in place.
For bolted teeth, tighten the bolts securely with the wrench.
For welded teeth, weld them onto the bucket lip, ensuring strong and even welds.
Step 5: Inspect and Test
Check the Tightness: Ensure all pins, bolts, or welds are secure to avoid loosening during operation.
Test the Installation: Operate the equipment briefly to check the teeth’s stability and performance.
Routine Maintenance: Inspect teeth regularly to monitor wear and prevent unexpected failures.
Tips for Success
Keep Spare Teeth: Having extras on hand reduces downtime during unexpected failures.
Follow Manufacturer’s Guidelines: Adhering to instructions ensures proper fit and longevity.
Use High-Quality Components: Invest in durable teeth and fasteners to avoid frequent replacements.
Work Safely: Always wear protective gear and ensure the equipment is powered down before starting.
By following these five steps, you can confidently choose and replace bucket teeth yourself, ensuring your equipment remains efficient and productive.
Searching for a Bucket Teeth Manufacturer in China? G-TOP is Your Best Selection!